The dream catcher, traditionally a Native American amulet used to dispel nightmares, is a well-known symbol associated with deep-rooted meanings and beliefs. Today dream catchers have become recognised and used as a decorative item to add an earthy, mystical touch to dreamy boho décor.
Dream catchers can be made from many types of materials. Metal, lengths of cane and embroidery hoops wrapped in wool, ribbons, leather or fabric strips can all be used for the framework. Adornments may be fake flowers, charms, beads, crystals, feathers and or ribbons. We show how combining a range of different materials can create a variety of styles that transform the traditional dream catcher into a stunning designer piece.
We share the DIY instructions for our bewitching bohemian dreamcatchers, perfect for a carefree, barefooted crafternoon!
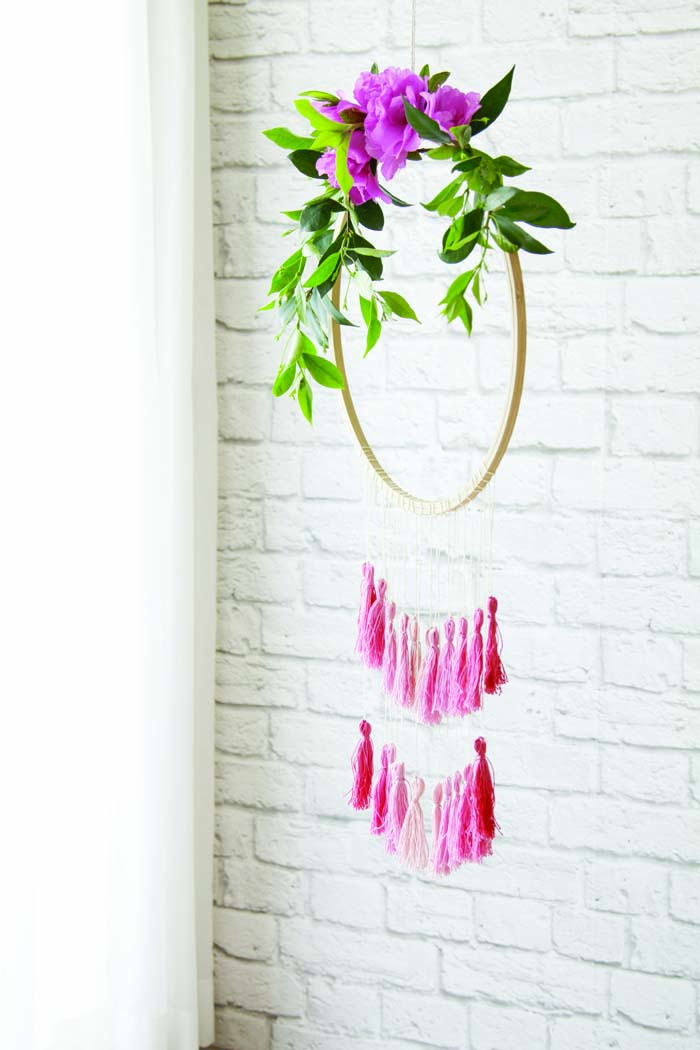
C O N T E M P O R A R Y C O O L
You will need:
36cm cane embroidery hoop
Cotton thread to make tassels
Flowers, fresh or artificial
Floral tape or wire
Note: Varying shades of pink were used to create a colour wash effect in the dream catcher shown.
How to create:
1. To make tassels, wrap cotton thread around an 8cm square of cardboard about 30 times.
2. Cut a 20cm length of thread, thread it through the loops at one end and tie a double knot.
3. To form the head of the tassel, cut through the thread at the other end and wrap another 20cm length of thread around the uncut end approximately 2cm from the top.
4. Attach the tassels to the edge of the cane hoop with additional lengths of cotton thread.
5. To complete, add flowers and foliage to the top of the hoop before hanging.
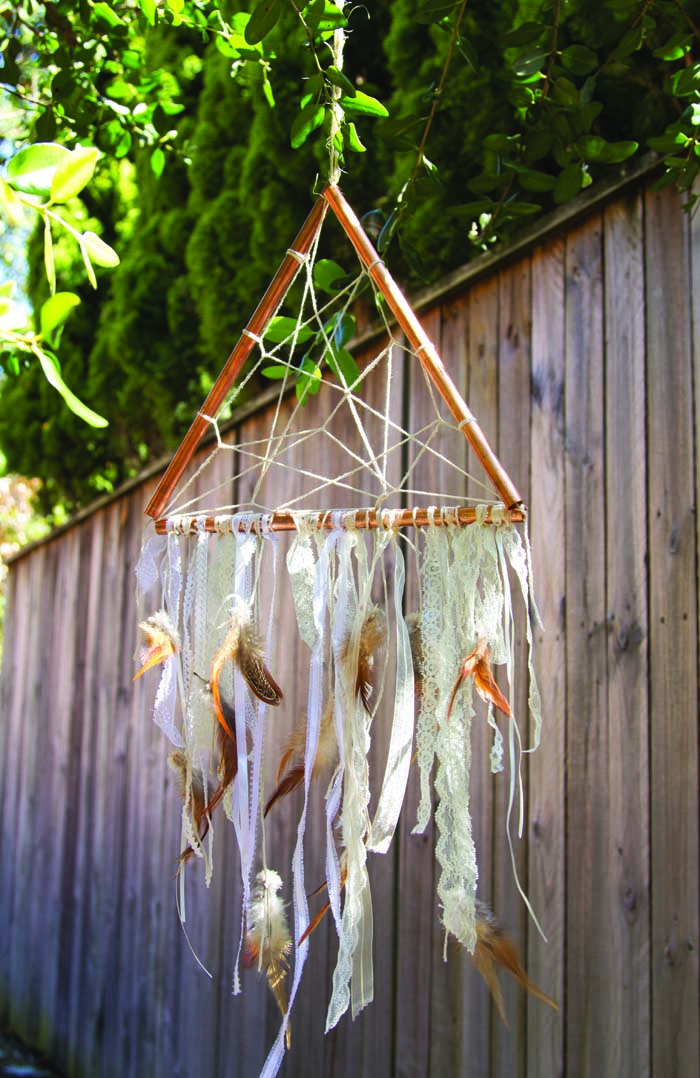
G E O M E T A L L I C
You will need:
Narrow copper tubing
Mitre box
Hack saw
String or jute
Lace, ribbons and feathers
How to create:
1. Cut the copper tubing into three 30cm lengths using a mitre box and hack saw.
Note: This is easier to do with two people – one person holds the copper tube firmly in place while the other saws.
2. To make the triangle dream catcher, thread a 1.2m length of cord through three lengths of tubing and tie together to form a triangle shape.
3. To complete, weave a mesh within the triangle with string or jute using the step-by-step tutorial on the following pages as a guide. Finish by wrapping lengths of ribbon and lace along the bottom edge of the triangle and add some feathers.
WHERE TO BUY MATERIALS
Copper tubing, mitre box and hack saw are available from hardware stores. Check if the hardware store will cut the tubing for you before purchasing the mitre box and saw. Embroidery hoops are available from www.feathers.com.au
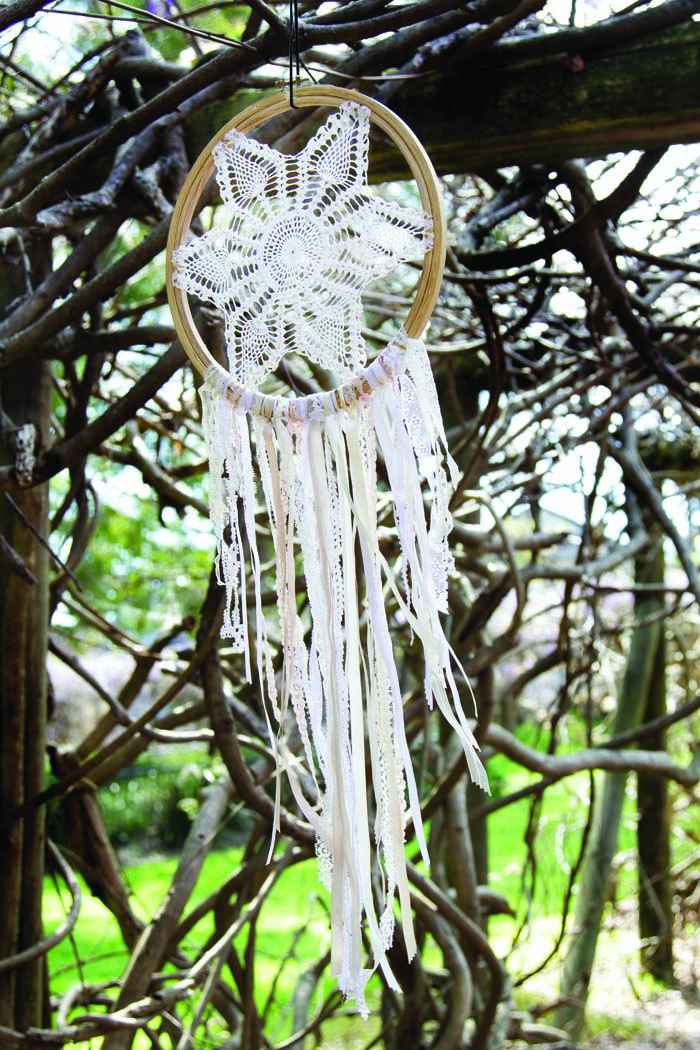
V I N T A G E R O M A N C E
You will need:
27cm cane embroidery hoop
Large crochet doily
Spray starch
Cotton thread
Ribbons and lace
How to create:
1. Spray the doily with spray starch and press with a warm iron.
2. Remove the outer frame from the hoop and attach the doily to the inner hoop with some cotton thread to hold the doily in position. Return the outer hoop to its original position and tighten to hold the doily firmly in place.
3. To complete, tie ribbons, lace and any other trinkets you think will look good, to the bottom edge of the frame.
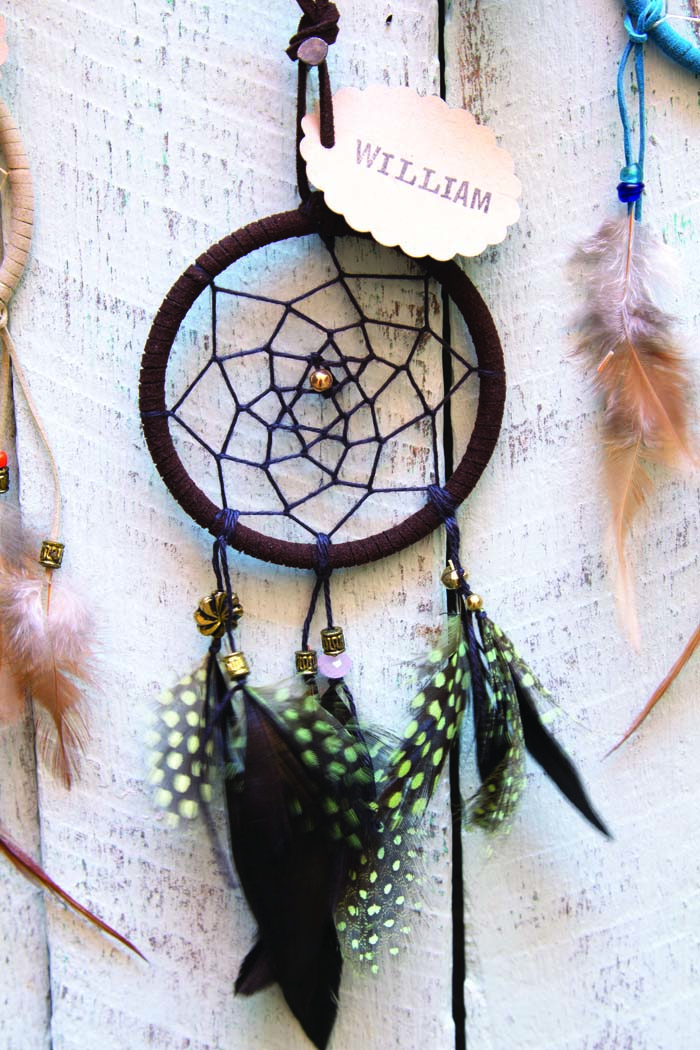
D R E A M C A T C H E R P L A C E C A R D S
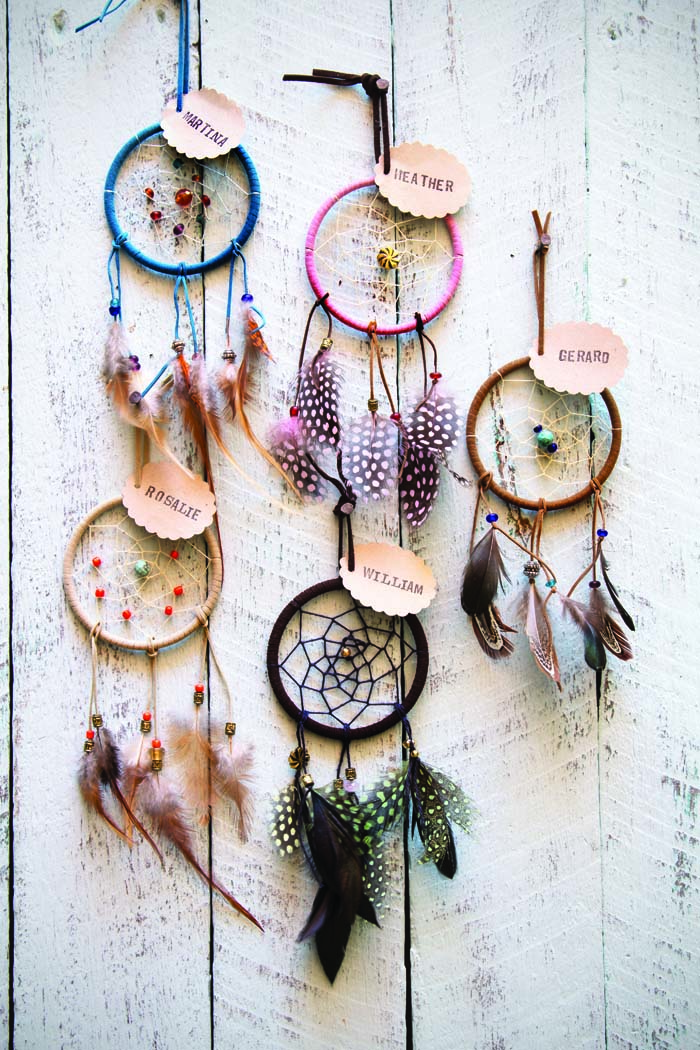
Miniature dream catchers have been made to double-up as a place card and a favour gift. They can be placed at each place setting or arranged on a board for guests to take when they arrive at the reception.
You will need:
3’’ closed metal rings
Faux leather lacing
Crochet thread or twine
Beads and charms
Feathers
Craft glue
Step 1: WRAPPING THE RING
1. Cut a two metre length of leather lacing and tie one end firmly to the top of the ring.
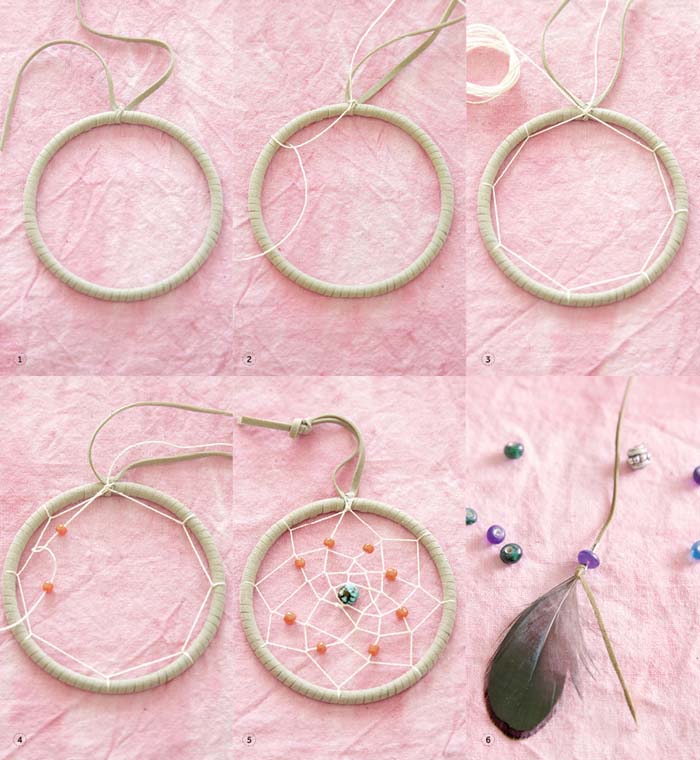
2. Wrap the remaining lacing around the ring tightly until it is completely covered. See image1. If the lacing loosens while you are wrapping the ring, you have the chance to tighten it before finishing off with a knot at the end.
Note: Leave some extra lacing at both ends to make a loop to hang the completed dream catcher.
Step 2: WEAVING THE MESH
1. Cut a 1.2m length of cotton thread or twine and tie with a double knot to the loop of the leather-wrapped ring.
2. Make the first knot one eighth of the way around the ring as shown in image 2.
Note: Eight equally spaced sections are traditional but you can have more or less if desired.
3. Holding the thread firmly, make the second knot a quarter of the way around the ring. Continue the knotting until you are back to where you started where you tie
a double knot around the ring but do not cut the thread at this stage. See image 3.
4. Continue making ever decreasing circles by making the knots at the midpoints of the sections of thread. If you want to add beads to the mesh this is the time to thread them onto the string as you work. See image 4.
5. Continue the weaving process until you reach the centre where you can add a feature bead before tying with a double knot. Trim any excess thread and add a dab of glue to the knot to tidy-up any loose threads. See image 5.
Step 3: ADDING EMBELLISHMENTS
1. To make the hanging feather charms, cut three 15cm lengths of twine or lacing. Tie feathers to one end of each piece of twine with a double knot. Add a dab of glue to make sure the feathers will not come loose, then slip the quill of the feather into a bead or trinket to help secure in position. See image 6. Repeat at the other end of the twine remembering to thread the beads onto the twine first.
2. Fold the twine in half and attach to the ring with a lark’s head knot.
3. Add a tag with the guest’s name to finish.
WHERE TO BUY MATERIALS
Metal rings and feathers are available from www.feathers.com.au. Faux leather lacing, beads, and charms can be purchased from discount stores, craft stores and online. Crochet thread can be purchased from knitting or haberdashery stores.
If you are a DIY bride looking for projects and inspiration for your wedding, be sure to check out the latest edition of Modern Wedding DIY Magazine (preview here) and our blog!


