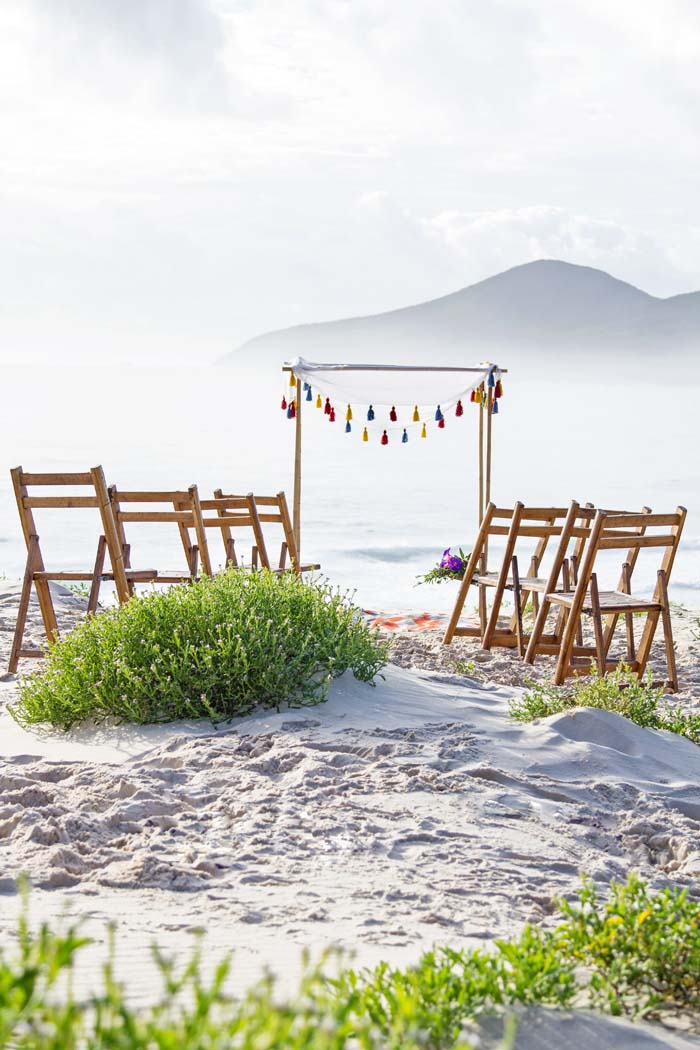
This DIY ceremony canopy is the perfect addition to a bohemian wedding theme. Built with a solid base to withstand any breezes, it can be easily transported to your location and quickly assembled on site.
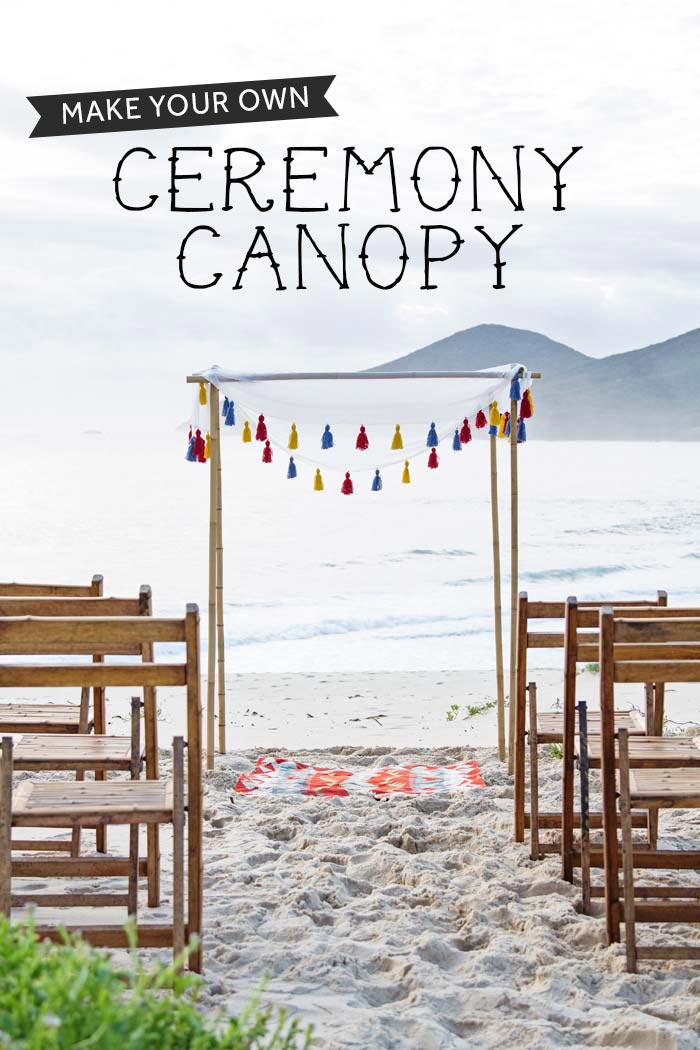
The size of the canopy will determine the amount of muslin needed for the cover and the lengths of the bamboo required for the cross beams. The canopy shown here was 156cm wide by 96cm deep. You can select whatever size canopy suits your needs.
S T E P 1 : F R A M E W O R K
Materials
- Eight 2m long bamboo poles**
- PVC pipe
- Silicone adhesive
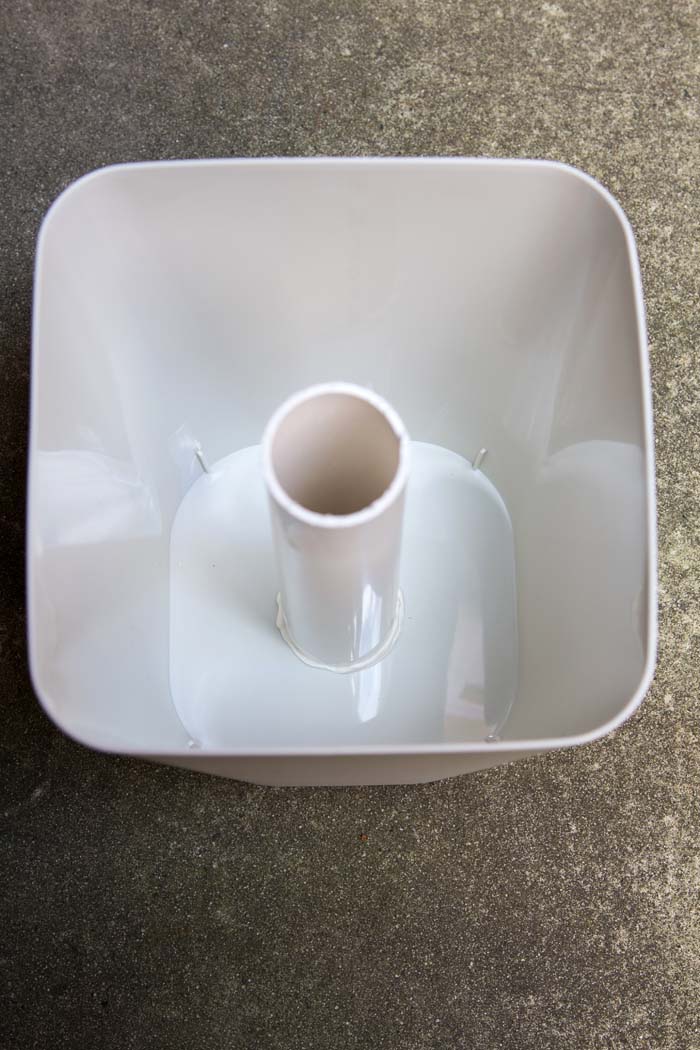
- Four containers to hold the concrete/ PVC pipe
- A two kilo bag of quick-set concrete
- Four 75mm bolts and nuts
- Hand saw and power drill
- Wood-working rasp
- Jute or thick string

How to create:
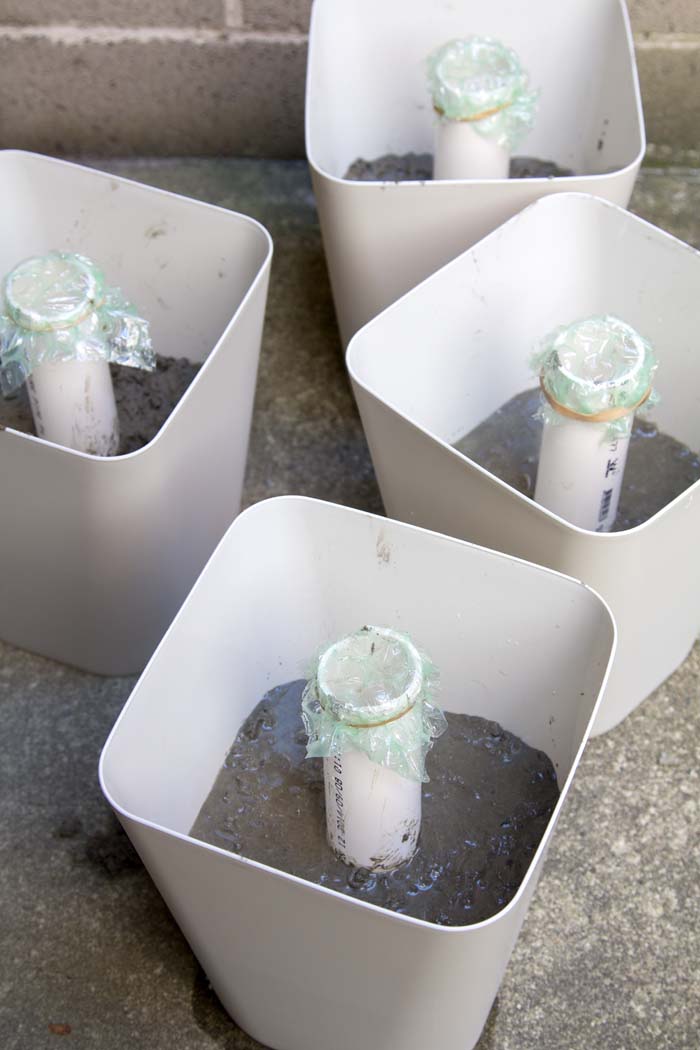
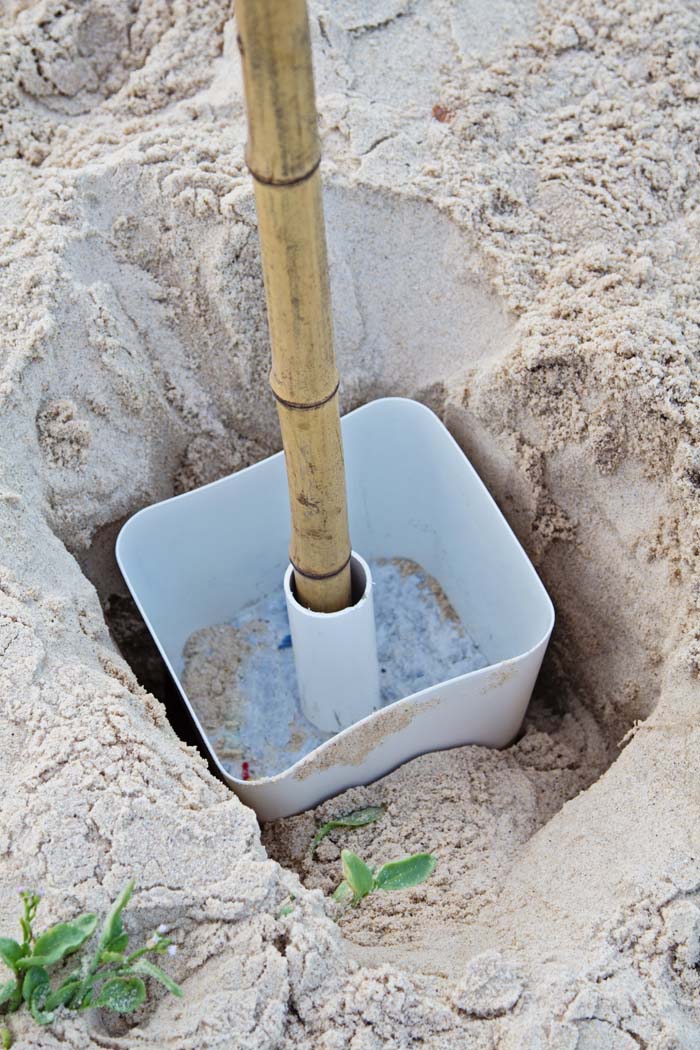
- To make the base for the frame, cut the PVC pipe into four 20cm lengths. Using silicone adhesive, glue the pipe upright in the centre of the bottom of the plastic container. Leave to dry.
- Cover the top of the PVC pipe to stop concrete entering the pipe during filling. Mix the concrete, fill each container with half a kilo and leave to set for two days. Note: filling the containers to the top with concrete is not necessary and will make them too heavy to lift.
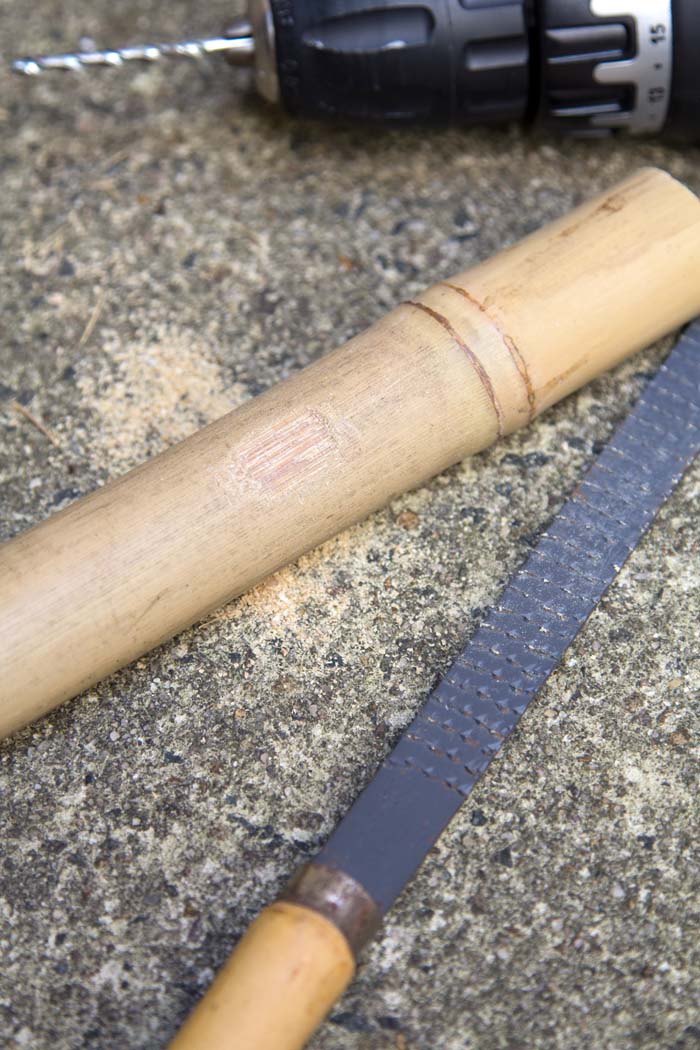
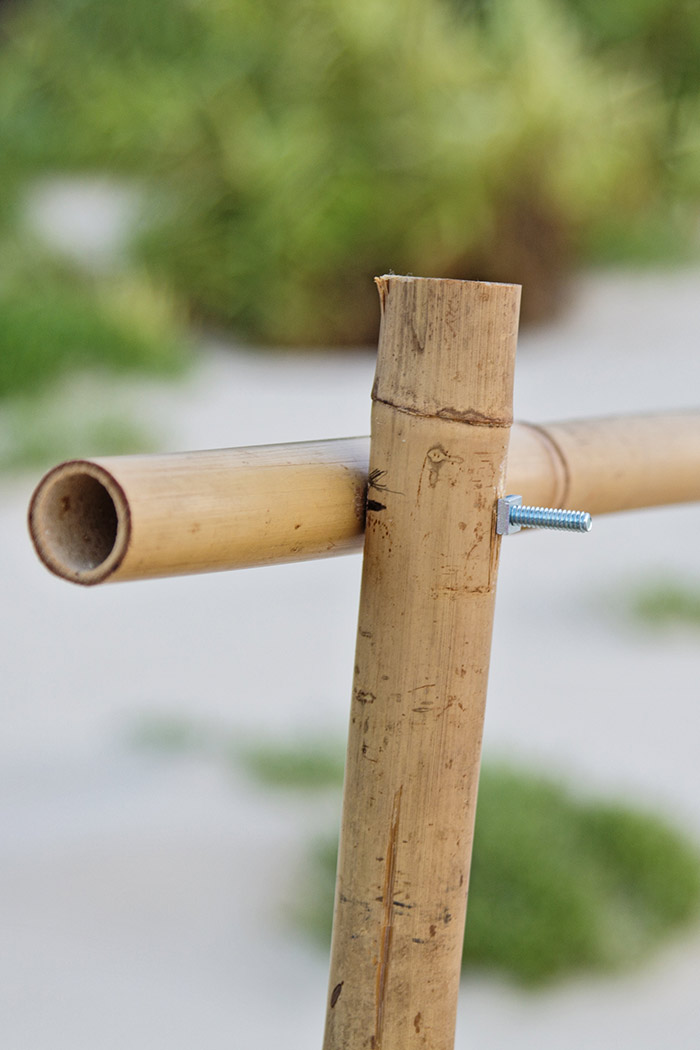
- Select the four thickest bamboo poles for the canopy frame uprights. Drill a hole 5cm from the top of each pole and set aside.
- For our demonstration the front and back cross-beam were 156cm long.
- Drill a hole 11cm from each end of each of the two poles making sure the drill holes line up. These cross-beams and the two 96cm side poles will be secured in position during erection on-site.
** Bamboo comes in restricted lengths. If you wish to vary the size of the canopy, any type of timber can be used for the frame work.
Tip: To make drilling through the bamboo easier, use a wood-work rasp or file to rough-up the surface before commencing drilling.
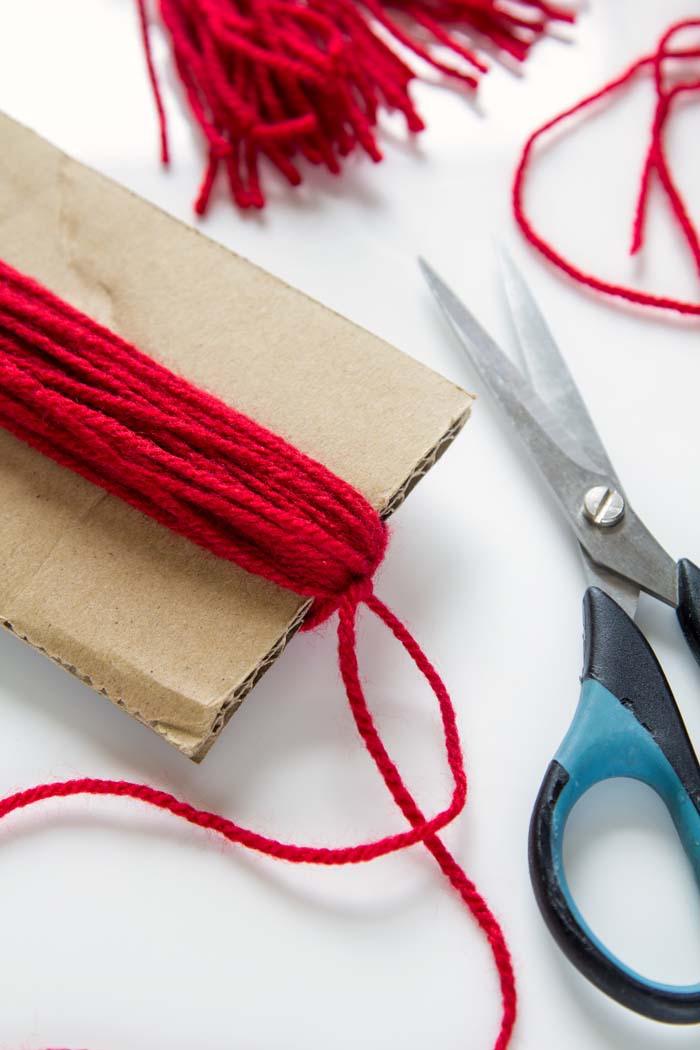
S T E P 2 : P O M P O M T A S S E L S
Materials:
- Several skeins of wool in colours of your choice
- 12cm square of cardboard
- Scissors
How to create:
- Wrap wool around the cardboard 30 to 40 times. Keep in mind that the tassels will look smaller from a distance, so they need to be bigger than you might otherwise make them. They can always be trimmed once on the canopy.
- Cut a 20cm length of wool, thread it through the loops at one end and tie a double knot.
- To form the tassel, cut through the wool at the other end.
- Cut another 20cm length of wool and wrap it around the uncut end approximately 2cm from the top.


S T E P 3 : C A N O P Y C O V E R
Materials
- A piece of white muslin, approximately 2 x 1.8m
- Sewing machine
How to create:
- Hem the cut edges using zig-zag stitching.
- Attach a tassel every 15cm by gently making a hole, threading the tassel through the hole and securing with a few knots.

S T E P 4 : C O N S T R U C T I O N
How to create:
- Take the prefabricated canopy to the site unassembled. Dig holes deep enough to cover the concrete bases.
- Insert the upright poles into the PVC pipes and fill with sand to stabilise them. Cover the bases with sand.
- Attach the front and back cross-beam poles to the upright poles with the bolts.
- Place the two 96cm side poles in position and tie with jute.
- Drape the muslin cover over the frame and trim the tassels if needed.
Psst! The bamboo folding chairs are available from Blessed Days.
For our latest and greatest how-to articles, pick up a copy of Modern Wedding DIY magazine here. If you're feeling especially creative, you should also give this DIY Floral Garland Tutorial a whirl!
