MW-Logo_#white
Menu
  • Find A Supplier
  • Blog
  • Galleries
  • Categories
  • Wedding Dresses
  • Real Weddings
  • Wedding DIY
  • Honeymoons
  • Magazines
  • Wedding Planning Tools
  • Advertising With Us
  • Login

Tips and Articles by category

Dresses
Cakes
Flowers
Honeymoon Ideas
DIY
Photography
Venues
Wedding Themes
Invitations
Wedding Ideas
Music
Videos
Wedding Hair and Makeup Ideas
Cars
Destination Weddings
Speeches
Gift Registries
Wedding Favours
Grooms

FIND A LOCAL WEDDING SUPPLIER

Reception Venues
Dress Retailers
Dress Designers
Cakes
Photography
Bridesmaids
Flowers
Video
Hair
Theming and Styling
Entertainment and Music
Makeup
Ceremony
Celebrants
Rings
Cars, Transport
Invitations
Bridal Accessories
Destination Weddings
Gifts and Gift Registries
Shoes
Accommodation
Honeymoons
Beauty Services
Hire
Hens & Bucks Parties
Flowers Girls/Page Boys
Caterers
Bomboniere
Alternative Bouquets
Planner
Photo Booths
Formal Wear
Speciality Services
Finance
Groom and Groomsmen
Grooms and Groomsmen

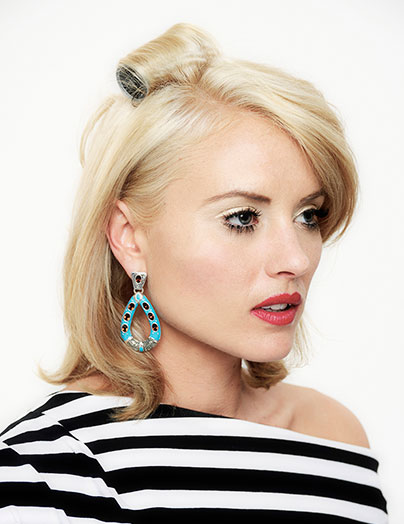
DIY Wedding Hairstyle

Modern Wedding Posted: October 15, 2012

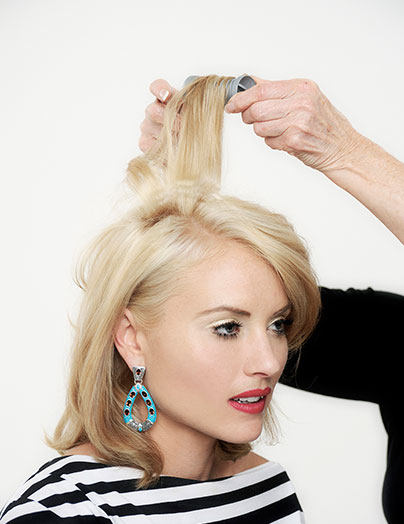
  1. Texturising tongs were used at the roots and hot rollers added after tonging for body.DIY Wedding Hairstyle step 1
  2. remove hot rollers after the hair has cooled downDIY Wedding Hairstyle step 2
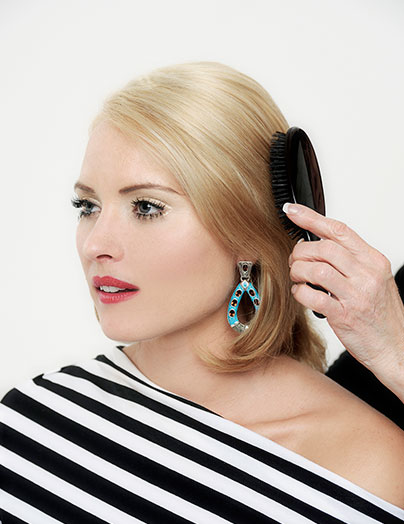
  3. Brush the hair thoroughly to relax the curl.DIY Wedding Hairstyle step 3
  4. make a triangle section from middle eye brows to crownDIY Wedding Hairstyle step 4
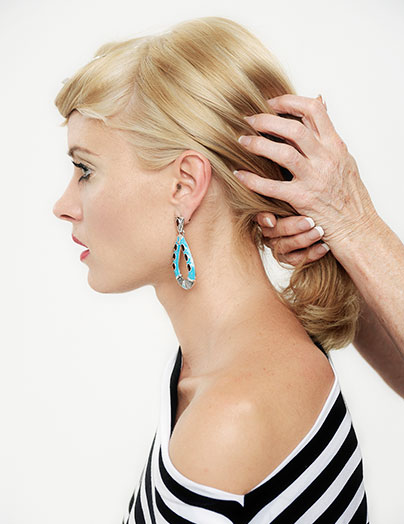
  5. Use you fingers as a comb, to direct the hair to the nape.DIY Wedding Hairstyle step 5
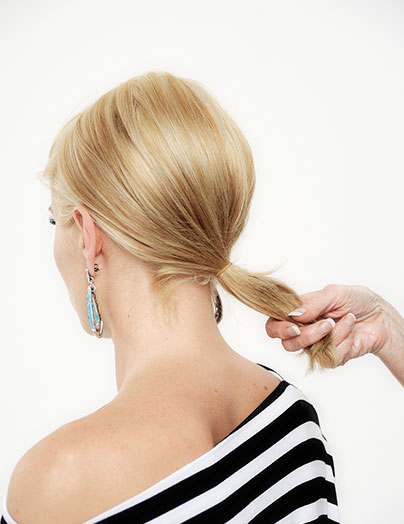
  6. place the hair into a pony right side below the earDIY Wedding Hairstyle step 6
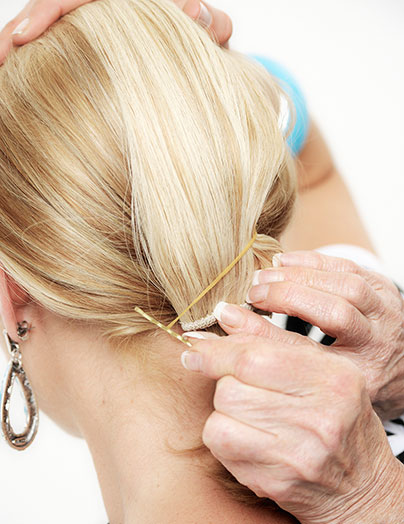
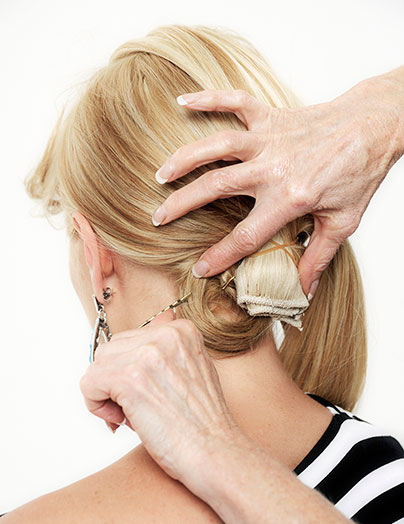
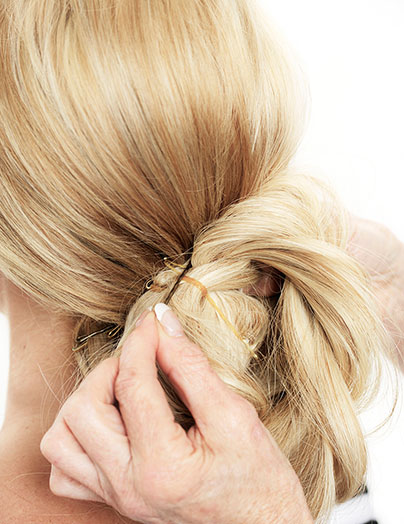
  7. Direct the base of hair piece down towards the nape.Using small elastic with two bobby pins attached. Secure the bobby pin into hair on the out side of the hair piece.DIY Wedding Hairstyle step 7
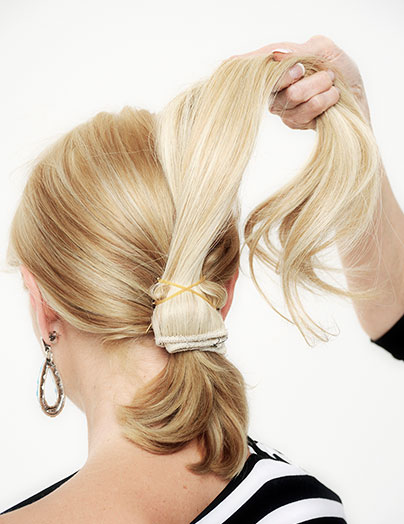
  8. Repeat last step with a second band/pins cross cross to hold in place.DIY Wedding Hairstyle step 8
  9. Make a curl with the pony pin to hold.DIY Wedding Hairstyle step 9
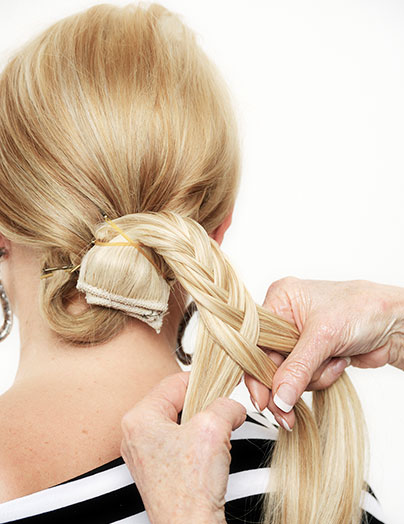
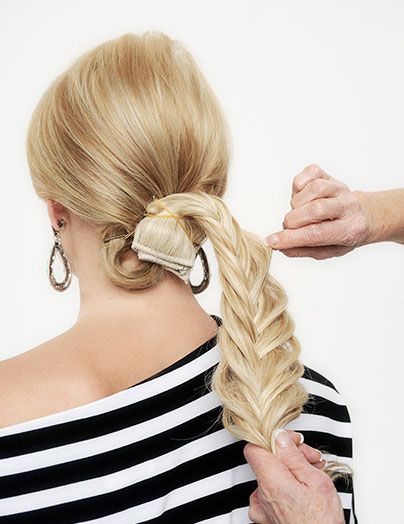
  10. Make a fish tail braid with the hair piece.DIY Wedding Hairstyle step 10
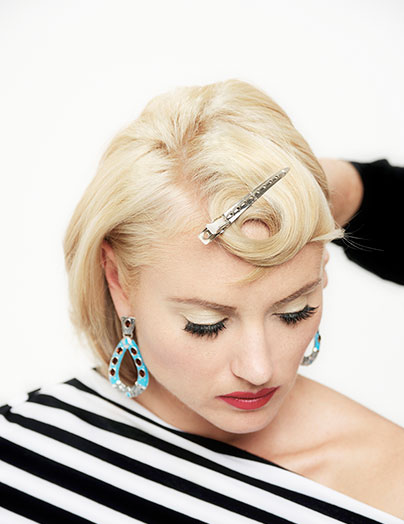
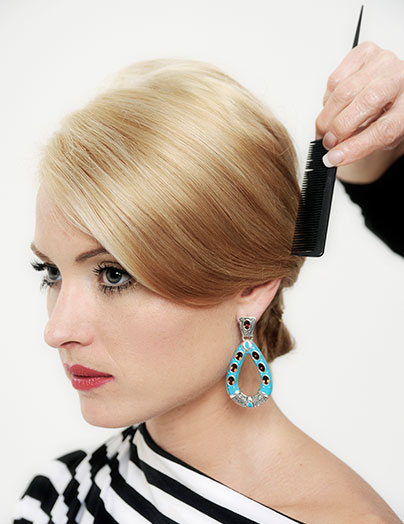
  11. Comb the front section across the face and direct ends into the back.DIY Wedding Hairstyle step 11
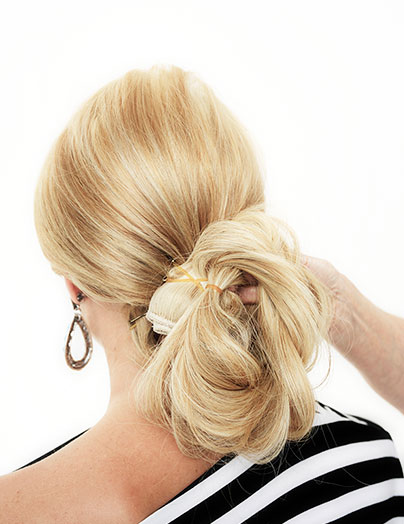
  12. Start at the end of the braid and pull the drapes of the fish tail gently out.DIY Wedding Hairstyle step 12
  13. Add a small band on the end and make a circular shape with the braid.DIY Wedding Hairstyle step 13
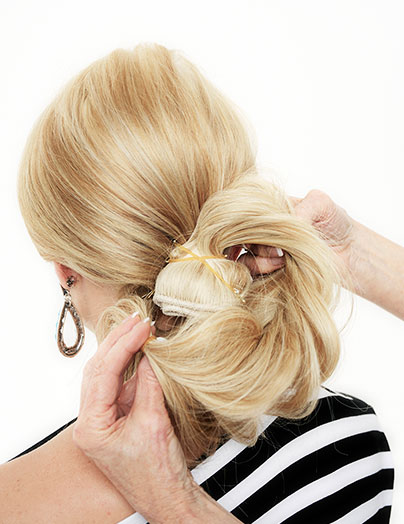
  14. Tuck the ends under to hide. DIY Wedding Hairstyle step 14
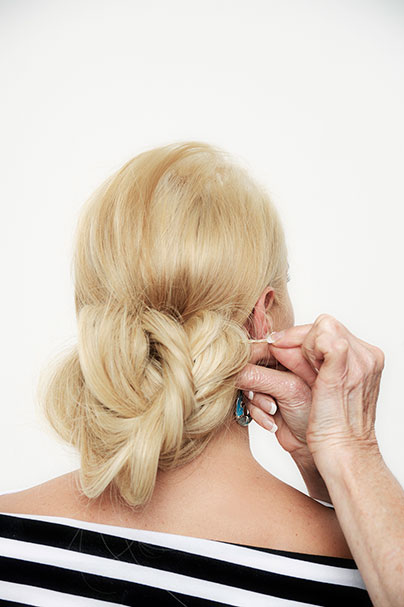
  15. Pin ends into the hair to secure in place. DIY Wedding Hairstyle step 15
  16. continue to arrange the drapes and pin to hold DIY Wedding Hairstyle step 16
  17. Finish with Goldwell Light Kiss hair spray while continuing to pin thoroughly.
Previous Blog
Next Blog

Find a wedding supplier

OR

Let’s be inbox official!

Wedding obsessed? So are we! Become a Modern Wedding Muse to have updates delivered straight to your inbox plus receive exclusive offers from our suppliers!
  • like us on facebook
  • follow us on instagram
  • follow us on pinterest
  • MagSlider-SH4
  • MagSlider-Cakes20
  • planner-12
  • MagSlider-DIGIM74update
  • luxury-9
  • MW-78
  • DIY7
  • flowers-17
  • h&B12
Colour Wheel

Your next read!

Top 6 Magnetic Lashes for Your Wedding Day

Looking For Some Wedding Inspiration? We’ve Got You!

Beauty Products To Add To Your Wishlist

Popular Galleries

  • Real Weddings
  • Dresses
  • Cakes
  • Flowers
  • Theming & Styling

From Our Blog

  • Real Weddings
  • Wedding Fashion
  • Wedding Themes
  • Wedding DIY
  • Wedding Hair & Beauty

Wedding Tools

  • Seating Plan
  • Guest List
  • Check List
  • Budget

ModernWedding.com.au

  • Wedding Tools Login
  • About
  • Advertising Information
  • Contact
  • Sitemap
Modern Wedding

Copyright © 2021 Modern Wedding PTY LTD. All Rights Reserved. Website by The DMA.

  • Sitemap
  • Privacy Policy
  • Contact

Our other brands: Luxury Wedding Blog / Sydney Wedding Blog