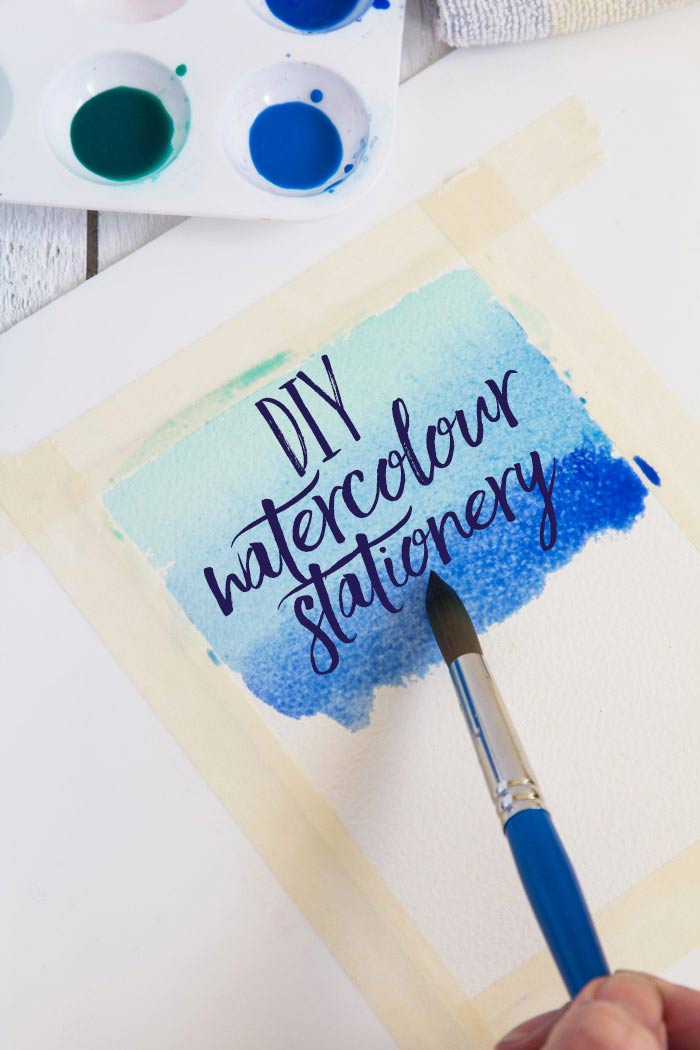
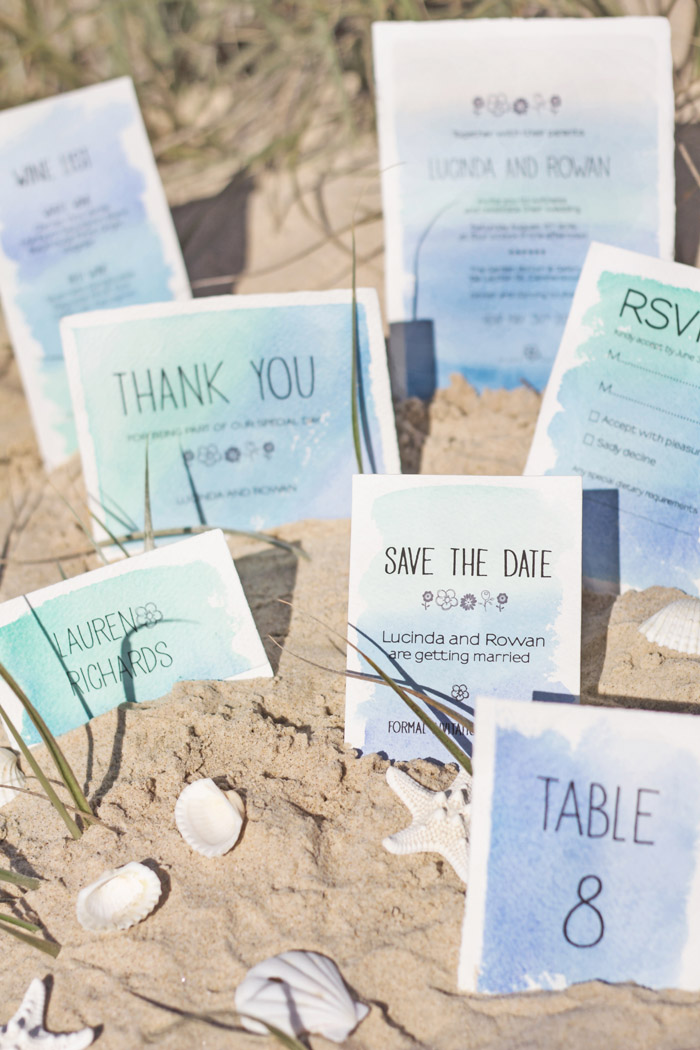
There is something soft, romantic, and oh-so pretty about watercolour wedding stationary. In the blended wash technique we show you here, the colours run into each other creating a degree of unpredictability that makes the result so interesting. One never really knows what the outcome will be but with the right selection of colours the result is rarely disappointing. Getting started with watercolour requires very few materials, the cost is minimal and no special talent is required.
MATERIALS
Size12 round brush for watercolours
Watercolour paints-- start with students’ quality paints before investing in artists’ paints.
Arches 100% cotton watercolour paper, 185gsm. Remember you need to print on it afterwards so any rougher could make it difficult.
Water to rinse brushes.
Masking tape to secure paper in position.
Towel to wipe brushes.
Plastic plate or palette.
All materials are available from www.eckersleys.com.au
STEPS
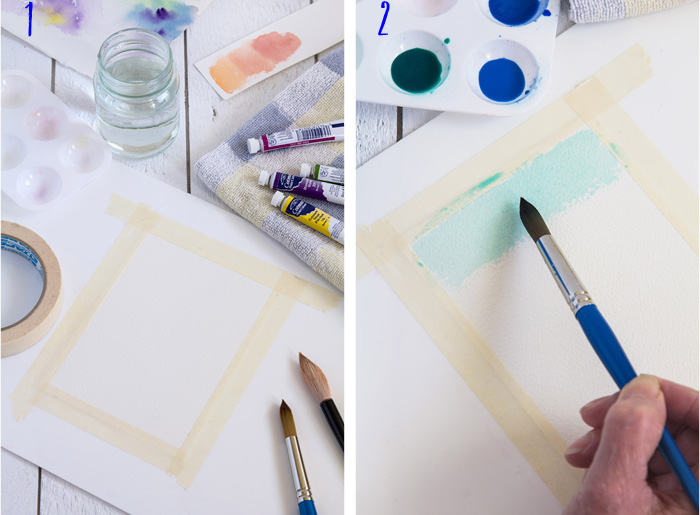
- Set up your work space before beginning to paint.
- Cut the watercolour paper to size allowing an additional 10mm all around to attach masking tape.
- Place the paper onto a firm surface and secure with masking tape. See image 1. It is important to hold the paper in position while working and for it to return to its original shape when dry.
- To achieve the blended wash effect apply the layers of paint in horizontal bands from the top down.
- Apply the first band of colour back and forth across the paper. If the brush is too wet, dab it on the towel to soak up the excess.Practice with different amounts of water and paint to get a feel for just the right amount of each, before embarking on your final designs. For example, for a wet flowing look, use more water than paint. You will love the end results and be happy that you spent a little extra time honing your skills. See image 2. It is important not to let the paint dry before application of the next colour.
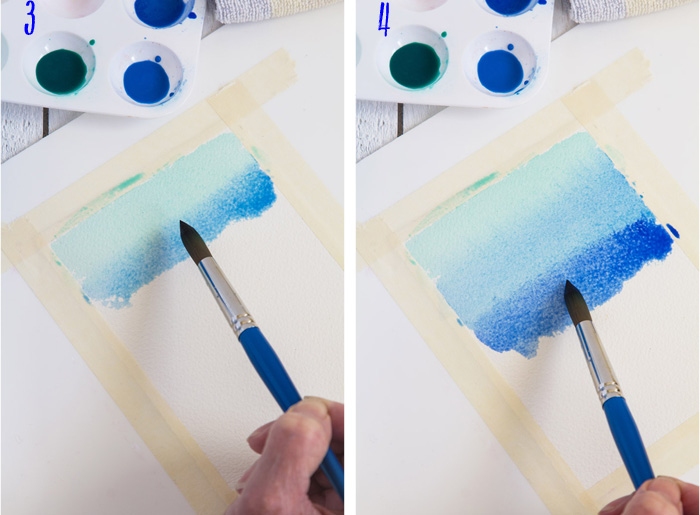
- To create a soft transition between the hues, add a new colour to the brush without cleaning it. Drag the brush with the new colour along the lower edge of the first coloured band. See image 3. Keep repeating this process, adding as many bands of colour as you want. See image 4. Note: If the paint is too thick or dark in colour, dip the brush in water to dilute the paint.
- The paper will pucker a little with the moisture but because it is held in place with the tape it will shrink back into shape when dry. Don't be tempted to touch it up while drying. The paint wash will even itself out gradually and evenly. Once dry, remove the tape and print your design.
To have the text fit perfectly on your watercolour wedding stationary, decide on the layout and words before you start painting! For more creative and crafty wedding DIY ideas, be sure to check out the DIY section of our blog!
