MW-Logo_#white
Menu
  • Find A Supplier
  • Blog
  • Galleries
  • Categories
  • Wedding Dresses
  • Real Weddings
  • Wedding DIY
  • Honeymoons
  • Magazines
  • Wedding Planning Tools
  • Advertising With Us
  • Login

Tips and Articles by category

Dresses
Cakes
Flowers
Honeymoon Ideas
DIY
Photography
Venues
Wedding Themes
Invitations
Wedding Ideas
Music
Videos
Wedding Hair and Makeup Ideas
Cars
Destination Weddings
Speeches
Gift Registries
Wedding Favours
Grooms

FIND A LOCAL WEDDING SUPPLIER

Reception Venues
Dress Retailers
Dress Designers
Cakes
Photography
Bridesmaids
Flowers
Video
Hair
Theming and Styling
Entertainment and Music
Makeup
Ceremony
Celebrants
Rings
Cars, Transport
Invitations
Bridal Accessories
Destination Weddings
Gifts and Gift Registries
Shoes
Accommodation
Honeymoons
Beauty Services
Hire
Hens & Bucks Parties
Flowers Girls/Page Boys
Caterers
Bomboniere
Alternative Bouquets
Planner
Photo Booths
Formal Wear
Speciality Services
Finance
Groom and Groomsmen
Grooms and Groomsmen

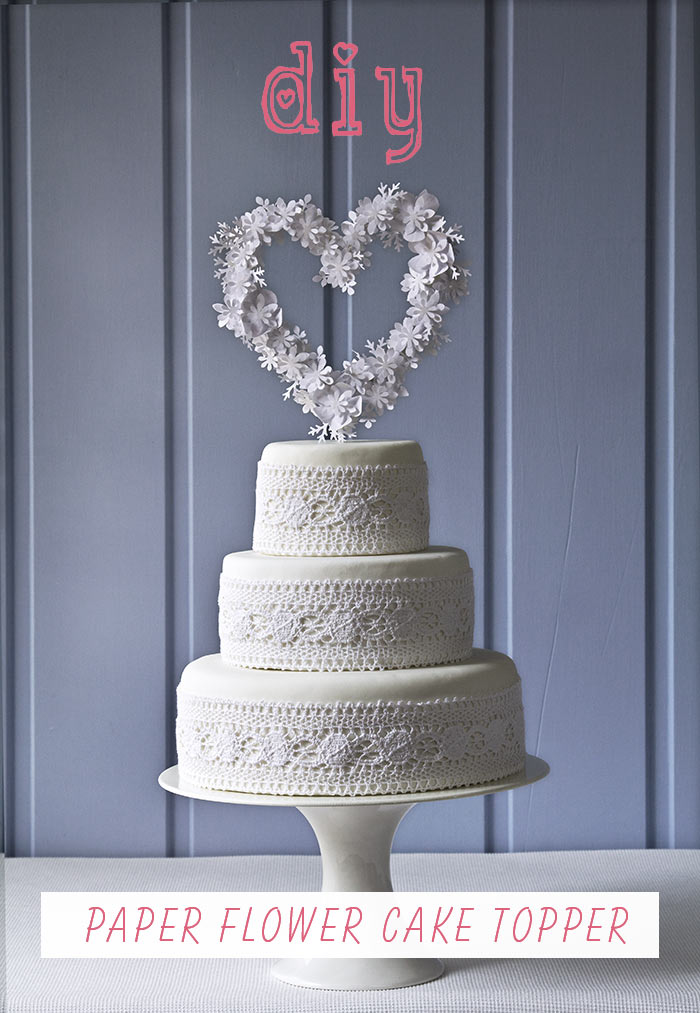
DIY Paper Flower Cake Topper

Modern Wedding Posted: March 29, 2017

Our delicate little cake topper adds impact with lots for pretty texture! Learn how to make yours with our tutorial below!

Materials

  • 18 gauge floral wire
  • White floral tape
  • Assorted leaf and flower paper punches
  • White paper (at least 100gsm)
  • 5mm double-sided adhesive foam pads
  • hot glue gun

Steps

  1. Mark the centre of a 45cm length of floral wire. This will be the centre point of the heart.
  2. Starting from the centre, shape one side of the wire into a heart shape, then repeat on the other side.
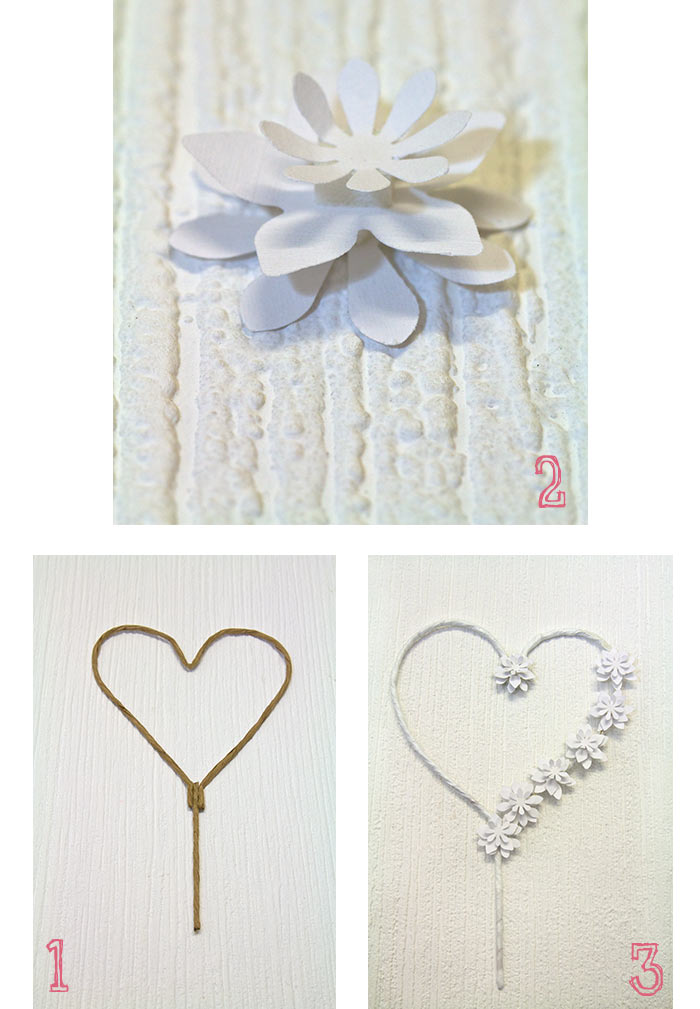
  3. Cut an additional length of floral wire 9cm long and glue it in between the wires at the open end of the heart. This will be inserted into the cake when finished. See image 1.
  4. Wrap the completed wire heart in white floral tape.
  5. Punch from a piece of firm white paper a selection of flowers and leaves in varying sizes.
  6. Three dimensional flowers have been used to decorate the heart. To make these, use double-sided adhesive foam pads between the petal layers. See image 2.
  7.  Organise your flowers and leaves into groups before you start glueing them to the wire frame. Note: Both sides of the wire heart need to be decorated as the finished heart will be seen from both sides. Begin by attaching the flowers to one side of the frame with hot glue. See image 3. When completed, turn over and repeat on the other side.
  8. When all the flowers are in position, glue leaves randomly amongst the flowers.

For more gorgeous wedding DIY ideas, be sure to check out the latest issue of Modern Wedding DIY Magazine on sale now!

Previous Blog
Next Blog

Find a wedding supplier

OR

Let’s be inbox official!

Wedding obsessed? So are we! Become a Modern Wedding Muse to have updates delivered straight to your inbox plus receive exclusive offers from our suppliers!
  • like us on facebook
  • follow us on instagram
  • follow us on pinterest
  • MagSlider-SH4
  • MagSlider-Cakes20
  • planner-12
  • MagSlider-DIGIM74update
  • luxury-9
  • MW-78
  • DIY7
  • flowers-17
  • h&B12
Colour Wheel

Your next read!

DIY Floral Heart Decor Instructions

DIY-Twine-Flower-Feature

Easy DIY Twine Flower Instructions

Creative DIY Wedding Favours For The Crafty Bride

Popular Galleries

  • Real Weddings
  • Dresses
  • Cakes
  • Flowers
  • Theming & Styling

From Our Blog

  • Real Weddings
  • Wedding Fashion
  • Wedding Themes
  • Wedding DIY
  • Wedding Hair & Beauty

Wedding Tools

  • Seating Plan
  • Guest List
  • Check List
  • Budget

ModernWedding.com.au

  • Wedding Tools Login
  • About
  • Advertising Information
  • Contact
  • Sitemap
Modern Wedding

Copyright © 2021 Modern Wedding PTY LTD. All Rights Reserved. Website by The DMA.

  • Sitemap
  • Privacy Policy
  • Contact

Our other brands: Luxury Wedding Blog / Sydney Wedding Blog